Unit Map: Bronze Casting Project with Wax Sculpture and Plaster Investment
Unit Overview:
This unit introduces students to the process of bronze casting, focusing on creating a wax sculpture, preparing a plaster investment mold, and understanding the fundamentals of casting metal. Students will explore historical and contemporary practices of bronze casting, refine their sculptural skills, and learn technical processes involved in this ancient and enduring art form.
Unit Objectives:
By the end of this unit, students will:
Understand the principles and historical significance of bronze casting.
Design and sculpt a wax model suitable for bronze casting.
Prepare a plaster investment mold for casting.
Learn the technical process of bronze casting, including safety procedures.
Develop finishing techniques for cleaning and refining the final bronze piece.
Week 1: Concept Development and Wax Sculpting
Day 1: Introduction to Bronze Casting
Lecture/Discussion:
History of bronze casting (e.g., lost-wax process).
Overview of the process: Wax sculpture → Plaster investment → Metal pour → Finishing.
Activity:
Sketch and brainstorm designs for the bronze sculpture.
Discuss considerations for casting (e.g., size, undercuts, and hollowing).
Day 2: Wax Modeling Basics
Demonstration:
Techniques for working with wax (carving, adding wax, smoothing, and building armatures if needed).
Studio Activity:
Students begin sculpting their wax models based on their designs.
Day 3: Refining the Wax Sculpture
Studio Activity:
Focus on refining details and ensuring the sculpture is structurally sound for casting.
Check-in:
Individual feedback on designs and structural adjustments.
Day 4: Completing the Wax Model
Studio Activity:
Finalize the wax model, ensuring it is ready for spruing (adding wax channels for molten bronze flow and air escape).
Day 5: Wax Spruing
Demonstration:
How to add wax sprues for effective metal flow and air escape during casting.
Studio Activity:
Students add sprues to their sculptures.
Week 2: Plaster Investment and Bronze Casting
Day 1: Preparing the Plaster Investment Mold
Demonstration:
Mixing and applying plaster for investment molds.
Discuss safety precautions when handling plaster and wax.
Studio Activity:
Students prepare and pour plaster over their wax sculptures in investment molds.
Day 2: Curing and Wax Burnout
Activity:
Allow plaster molds to cure.
Discuss the burnout process: Melting the wax out of the mold to create a cavity for bronze.
Begin the burnout process in a kiln or furnace.
Day 3: Metal Pouring Preparation
Lecture/Discussion:
Safety procedures for working with molten metal.
Overview of the bronze melting and pouring process.
Activity:
Inspect molds after burnout for cracks or imperfections.
Prepare molds for metal pouring.
Day 4: Bronze Casting
Demonstration:
Melting and pouring bronze (performed by the instructor or under supervision in a safe environment).
Activity:
Students participate in or observe the casting process, focusing on safety and precision.
Day 5: Demolding and Cleaning
Activity:
Break away plaster molds to reveal the raw bronze sculpture.
Use files, saws, and sandpaper to remove sprues and clean up the bronze piece.
Discussion:
Troubleshooting and problem-solving any casting issues.
Week 3: Finishing and Presentation
Day 1: Refining the Bronze Sculpture
Demonstration:
Techniques for filing, sanding, and polishing bronze.
Studio Activity:
Students refine their sculptures, focusing on surface quality.
Day 2: Patination
Demonstration:
Applying patinas (chemical treatments) to create color and surface effects.
Studio Activity:
Students experiment with patination techniques on their sculptures.
Day 3: Mounting and Display Preparation
Demonstration:
Techniques for mounting sculptures on bases or stands.
Studio Activity:
Students prepare their sculptures for presentation.
Day 4: Final Critique and Reflection
Activity:
Students present their finished sculptures to the class.
Group critique focusing on design, execution, and process reflection.
Day 5: Documentation and Portfolio
Activity:
Photograph finished pieces for documentation.
Write a short artist statement describing the concept, process, and outcome.
Assessment Criteria:
Design and Creativity: The originality and thoughtfulness of the wax sculpture design.
Technical Proficiency: Skill in wax sculpting, plaster mold preparation, and finishing techniques.
Execution of Process: Adherence to safety protocols and proper execution of each step in the casting process.
Final Presentation: Quality of the finished bronze sculpture, including surface treatment and overall aesthetic.
Reflection and Documentation: Ability to articulate the creative process and final outcomes.
Materials and Equipment:
Wax (modeling wax and sprue wax)
Plaster investment materials
Bronze (provided in ingots or scrap)
Kiln or furnace for burnout and casting
Safety equipment (goggles, gloves, aprons, respirators)
Tools: Wax carving tools, files, sandpaper, polishing tools
Chemicals for patination (optional)
This unit allows students to develop both technical skills and a deeper appreciation for the bronze casting process, culminating in a professional-quality sculpture ready for display.
Lost-Wax Process Using a Slurry Cast
Humans have been casting bronze for almost 6000 years, and while the tools used have changed, the fundamentals of the process remain essentially unchanged. In this section, we'll be covering lost-wax, or investment casting, using a slurry instead of a plaster mold. This process is referred to as “lost-wax” because the original model, typically made from wax, is melted down in the process of creating a mold to pour metal into.
Step 1: Step 1: The Model

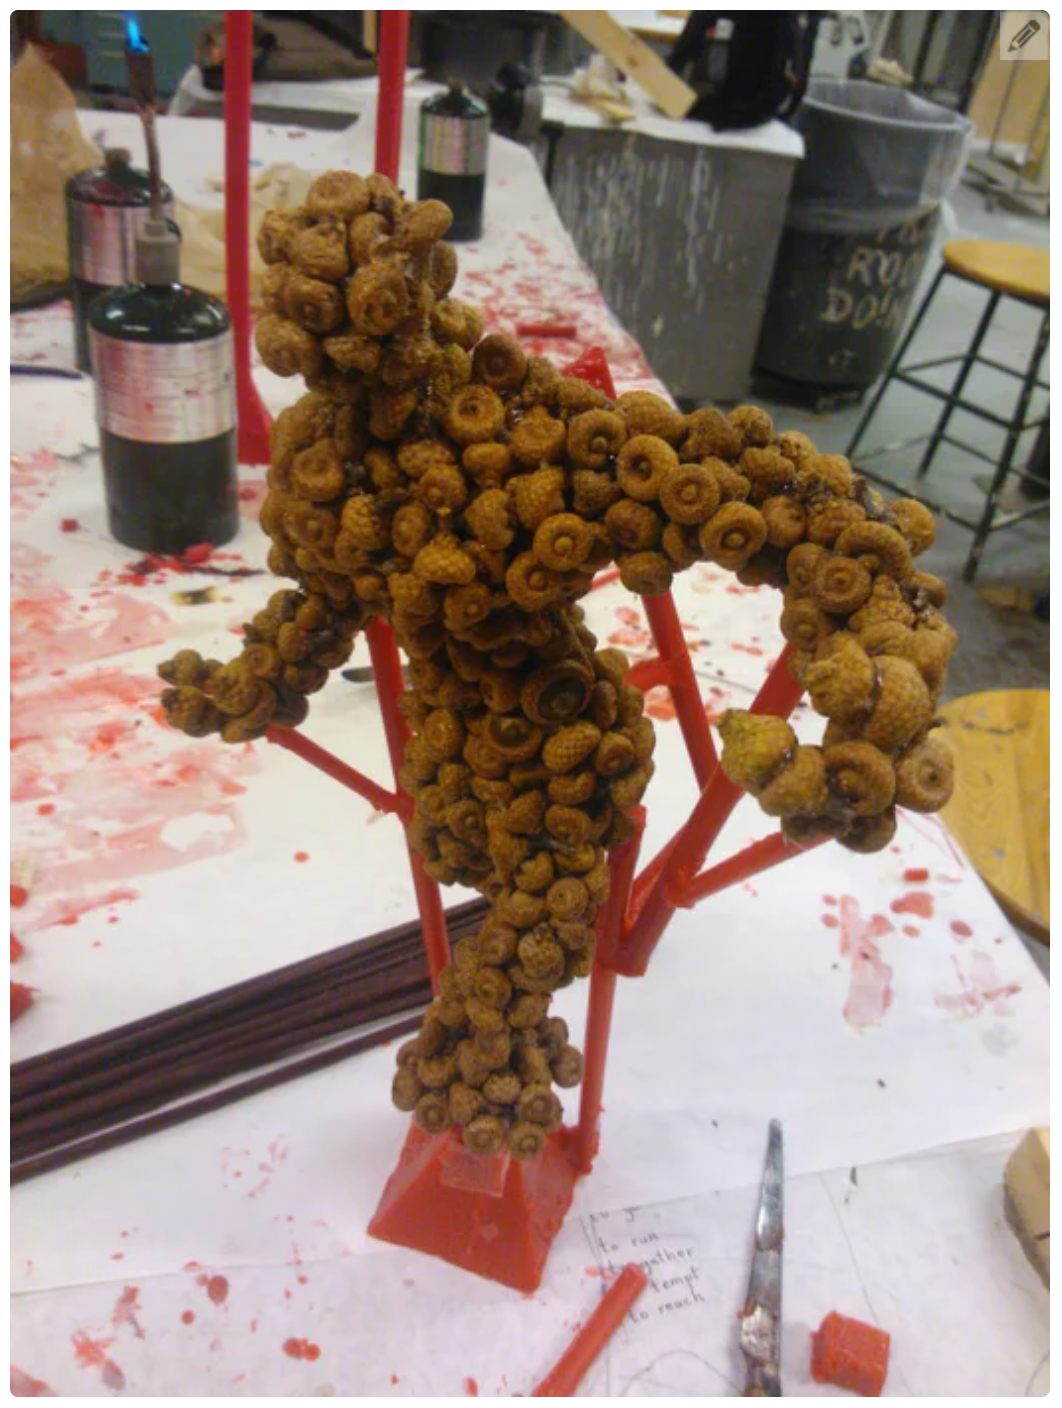
No matter what you’re planning to cast, you always start the same way, by making the source model. This can be as simple or complex a task as you choose to make it. Some people choose to sculpt directly in wax. However, because the wax model is destroyed in the casting process, if you want to keep the original or you need to create multiple copies of your model, it may be necessary to make the model from clay, then create a rubber and plaster mould in order to create a wax duplicate.
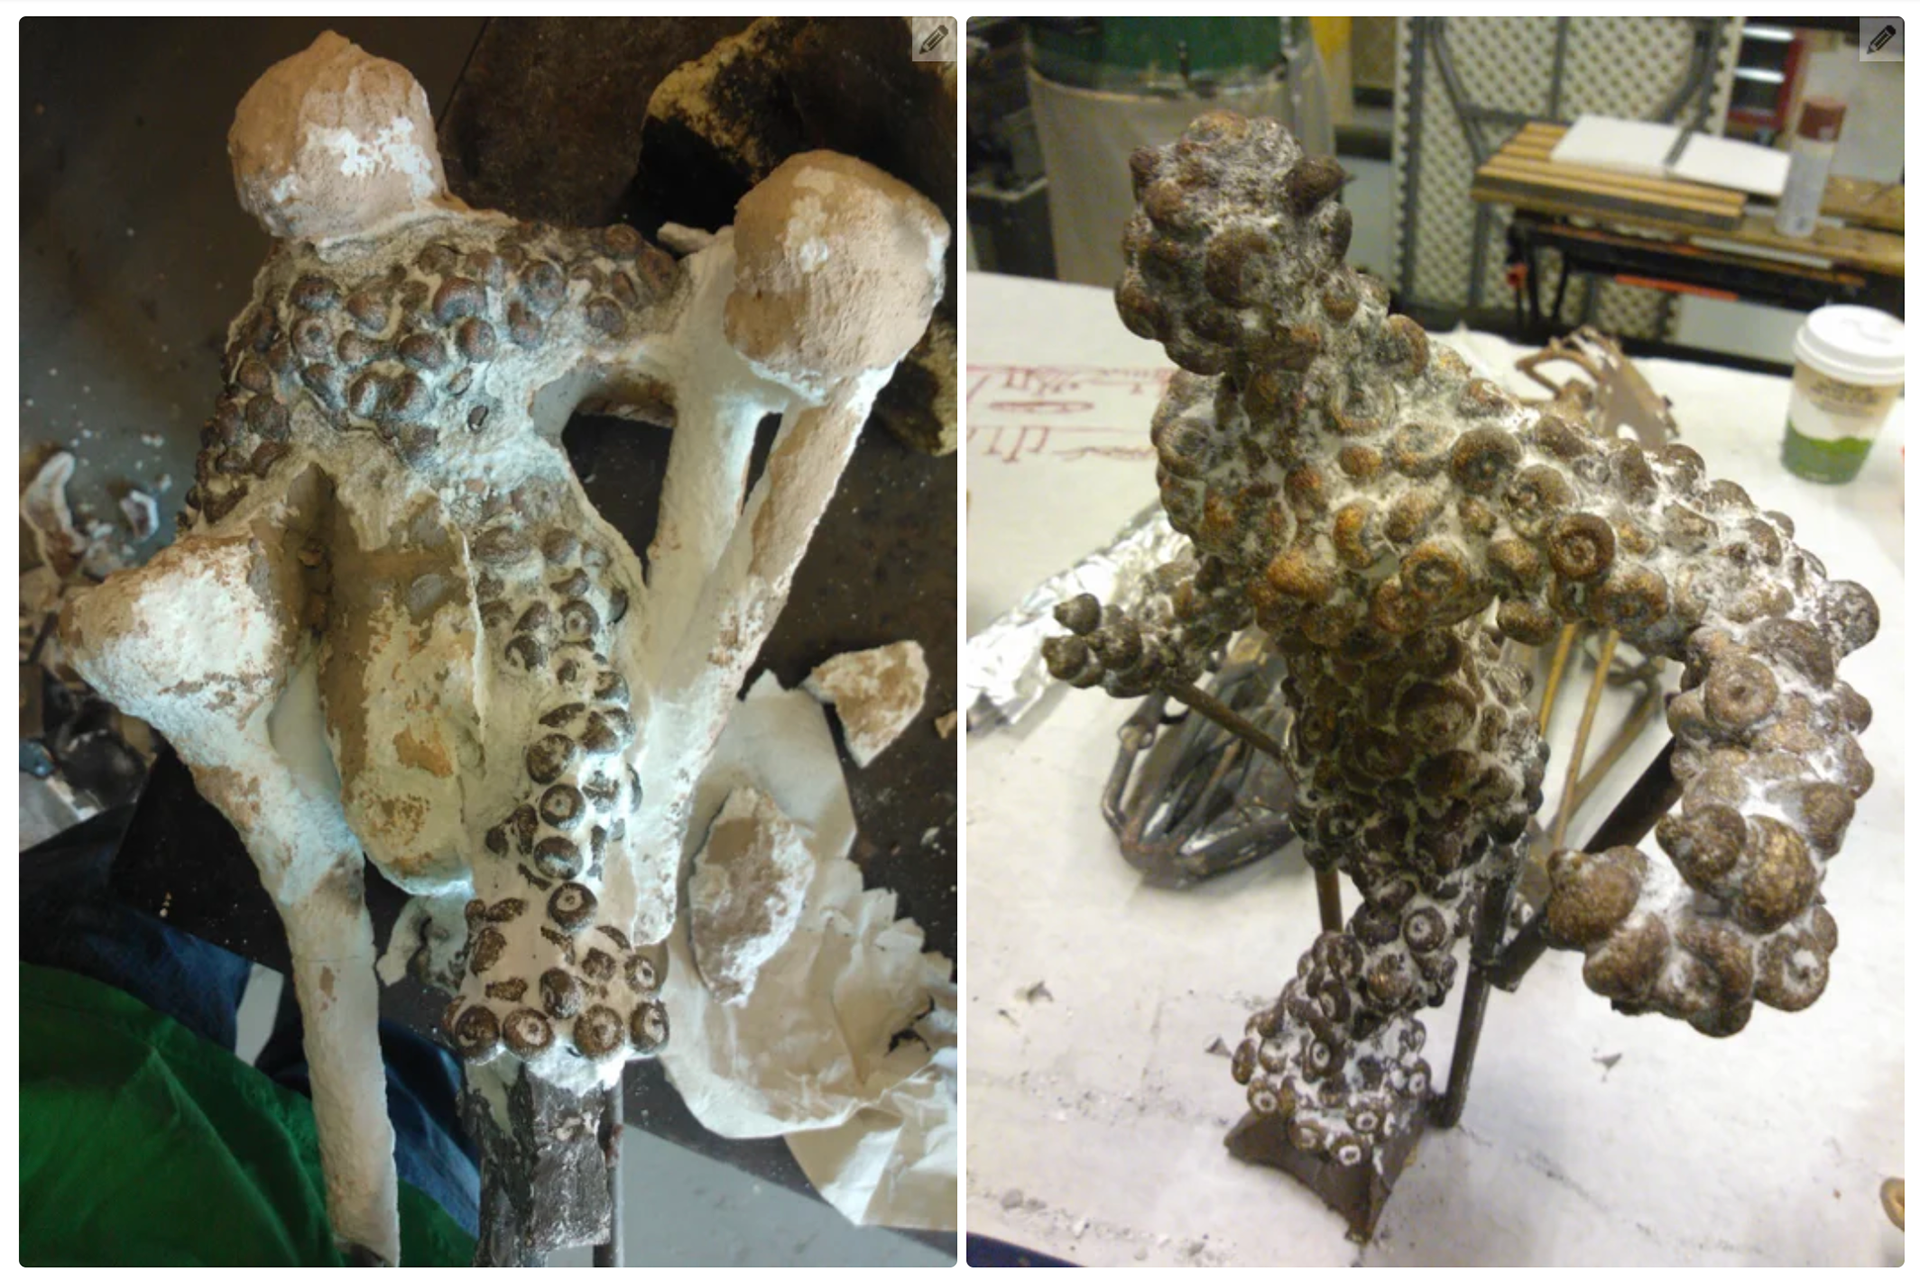
It’s also possible to skip the wax and use other organic materials. In the case of the sculpture I’m documenting here, the original model was made from acorns, which don’t melt as cleanly as wax (they don’t melt at all, obviously, but they do burn up nicely), but still evacuated the mold fairly well during the burnout process. This isn’t always a best practice, but my alternative was to make a fairly complex, multi-part mould to produce a wax duplicate, so I chose convenience. There are many factors to consider if you choose to use organic material in your mould – in particular, the temperature that it burns at and whether the shape of your model will allow the ash to escape cleanly – and it may not be the best option for you, but it is doable. In this case, I mostly skipped the wax since my original model was made with acorns. Although they don’t melt as cleanly as wax, acorns won’t survive the burnout process, so I can avoid having to make what would end up being the fairly complex multi-part mold necessary to produce a wax copy of the sculpture. The model, however, needed some additions in order to get it ready for casting.
It’s also possible to skip the wax and use other organic materials. In the case of the sculpture I’m documenting here, the original model was made from acorns, which don’t melt as cleanly as wax (they don’t melt at all, obviously, but they do burn up nicely), but still evacuated the mold fairly well during the burnout process. This isn’t always a best practice, but my alternative was to make a fairly complex, multi-part mould to produce a wax duplicate, so I chose convenience. There are many factors to consider if you choose to use organic material in your mould – in particular, the temperature that it burns at and whether the shape of your model will allow the ash to escape cleanly – and it may not be the best option for you, but it is doable. In this case, I mostly skipped the wax since my original model was made with acorns. Although they don’t melt as cleanly as wax, acorns won’t survive the burnout process, so I can avoid having to make what would end up being the fairly complex multi-part mold necessary to produce a wax copy of the sculpture. The model, however, needed some additions in order to get it ready for casting.
Step 2: Step 2: Spruing
If you’re planning to pour liquid metal into a vessel, you should probably make sure there’s an opening to pour into. Additionally, unless you’re pouring in a vacuum, your shell isn’t actually empty; it’s chock full of air, and it all needs to go somewhere else if you want to fill the whole thing with metal. Unfortunately, because molten metal cools very quickly once it leaves the crucible, there’s no time for air bubbles to rise to the surface and escape naturally, so the metal needs to force the air out of its way in order to prevent bubbles from ruining the casting. In order to facilitate getting the metal in and the air out, shells need to include a large cup to pour into, as well a series of tubes, called sprues, runners, and gates, which guide the metal from the cup to the primary cavity, and also allow the air to be pushed out through vents.
Wax will adhere well to most surfaces, acorns included, but proper technique is important in order to create a strong weld; in particular, the surfaces need to be evenly heated. In order to weld wax to wax, I briefly heat a thin metal blade or putty knife under a flame, then place the blade inside the joint so that both wax surfaces heat evenly. Quickly and smoothly removing the blade brings the two pieces into contact, and if done well, they will weld together and become a single piece. Acorns aren’t quite as easy to weld to, since the irregular surface is difficult to heat evenly. In order to connect gates to the model, I had to use a heat gun to flow wax into the creva
Step 3: Step 3: Shelling
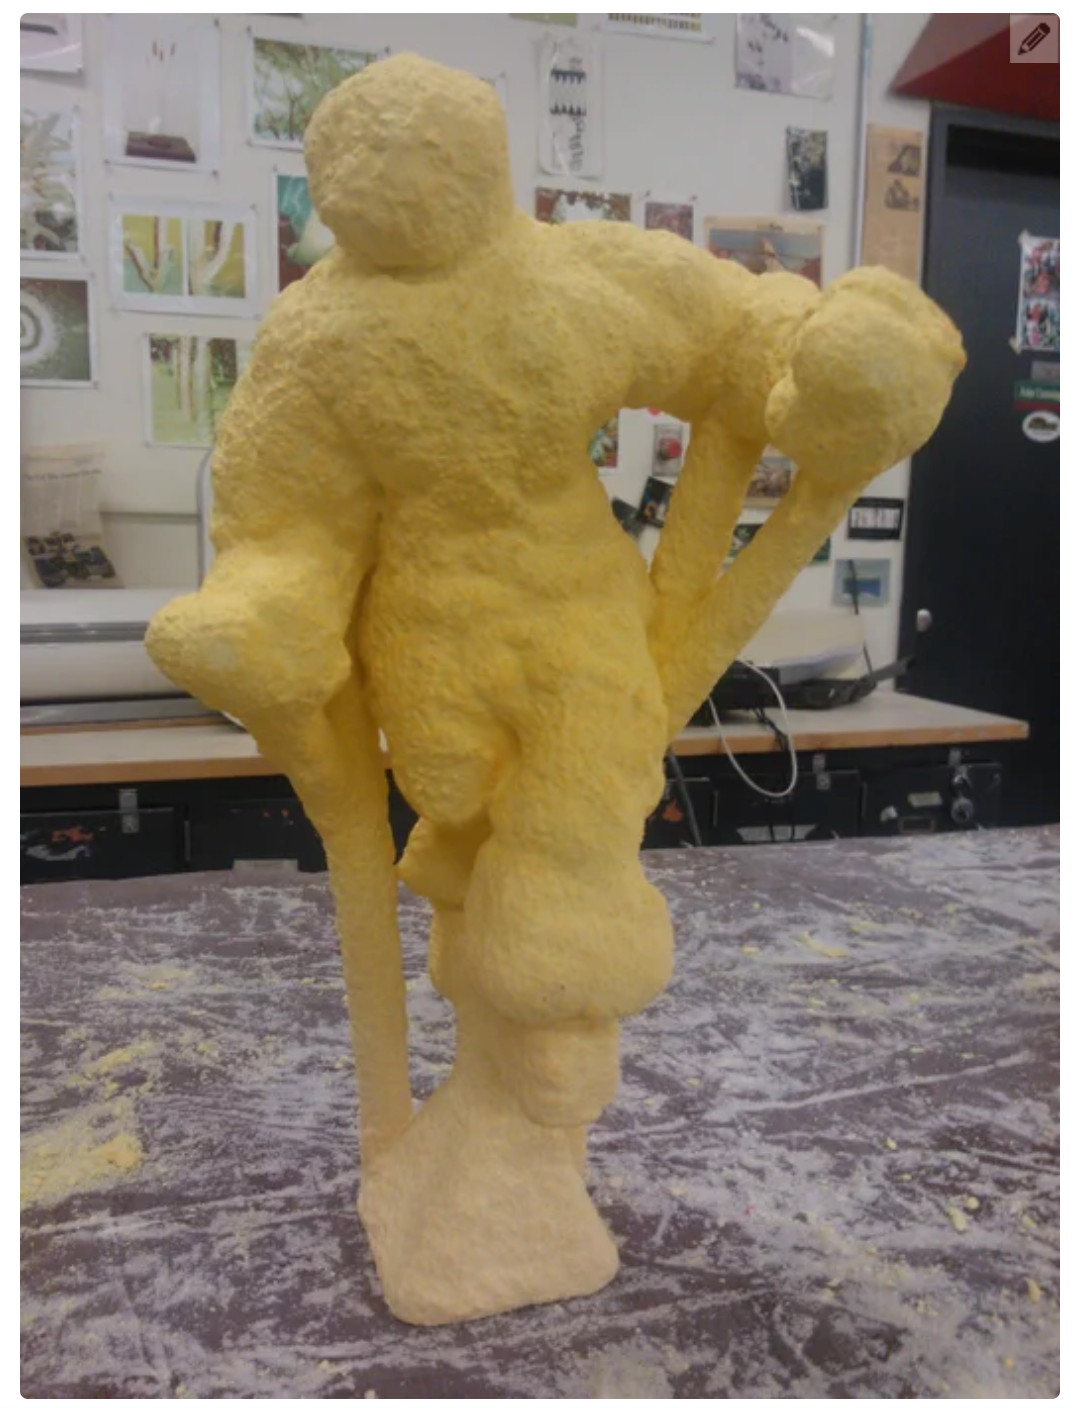
Shelling refers to the process of creating the negative vessel for the bronze. The shell is created by dipping the model into a silica slurry and coating it with silica sand of various grits. This is repeated over the course of several days in order to build up a ceramic shell at least half an inch thick, still leaving the top of the cup open.
Step 4: Step 4: Burnout
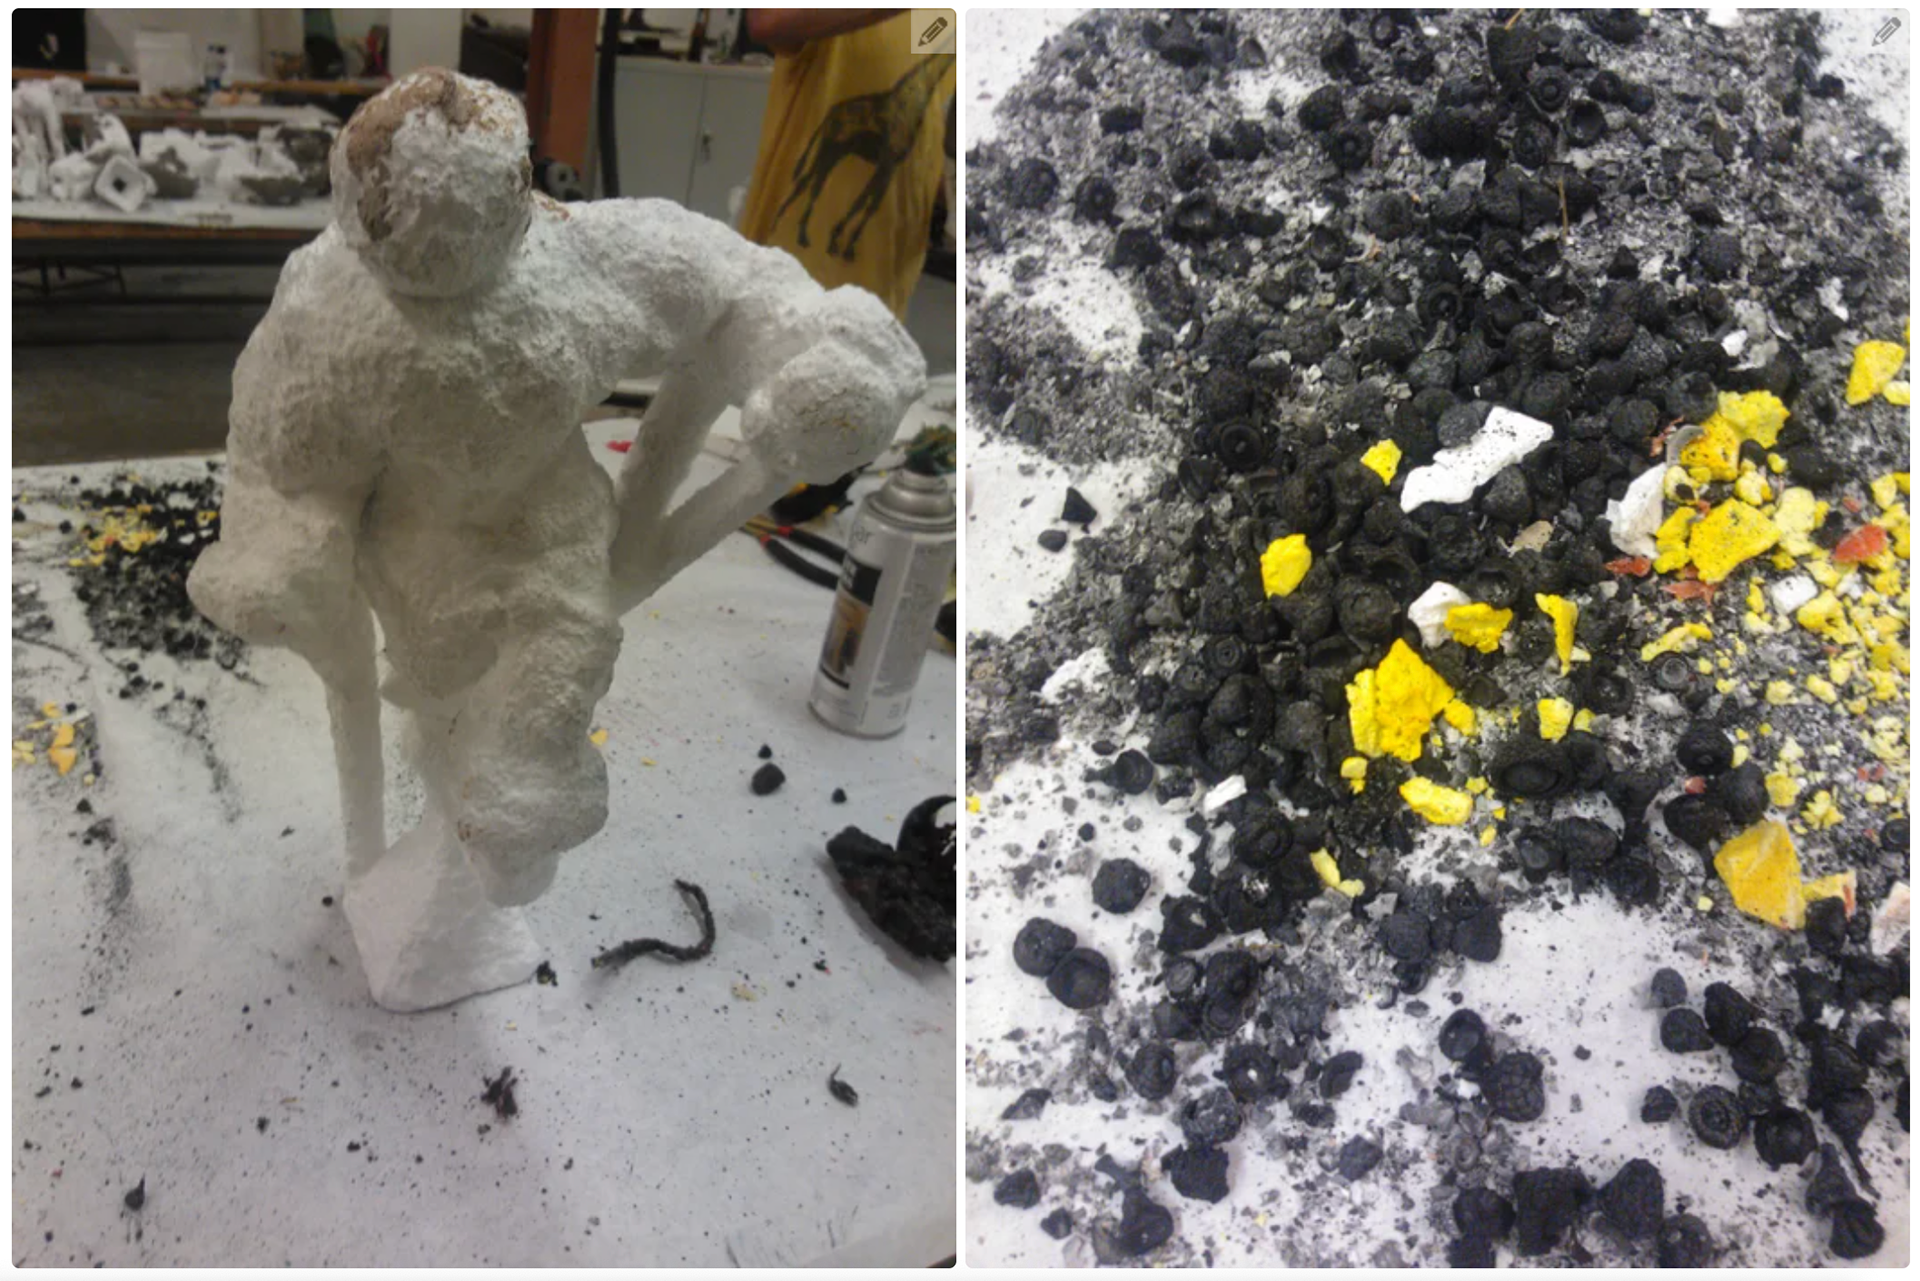
Once the shell is sufficiently thick, it’s finally time for the lost-wax part of lost-wax casting. The dried shells are placed upside down in a kiln (we refer to the cup as the top of the mold) and heated for several hours. The burnout process serves two purposes: First, the wax is literally lost as it melts and flows out through the cup. Second, the kiln bakes the shell, drying and hardening it. Notice how the shell changes from yellow to white. Once burnout is complete, you are left with a sturdy, hollow shell, ready for casting.
(Sometimes burnout doesn’t go perfectly. My acorns burned nicely, but ash isn’t a liquid, so they didn’t all make their way out of the shell the way they were meant to. Luckily, it wasn’t something an air hose and some patience couldn’t solve.)
Step 5: Step 5: Casting
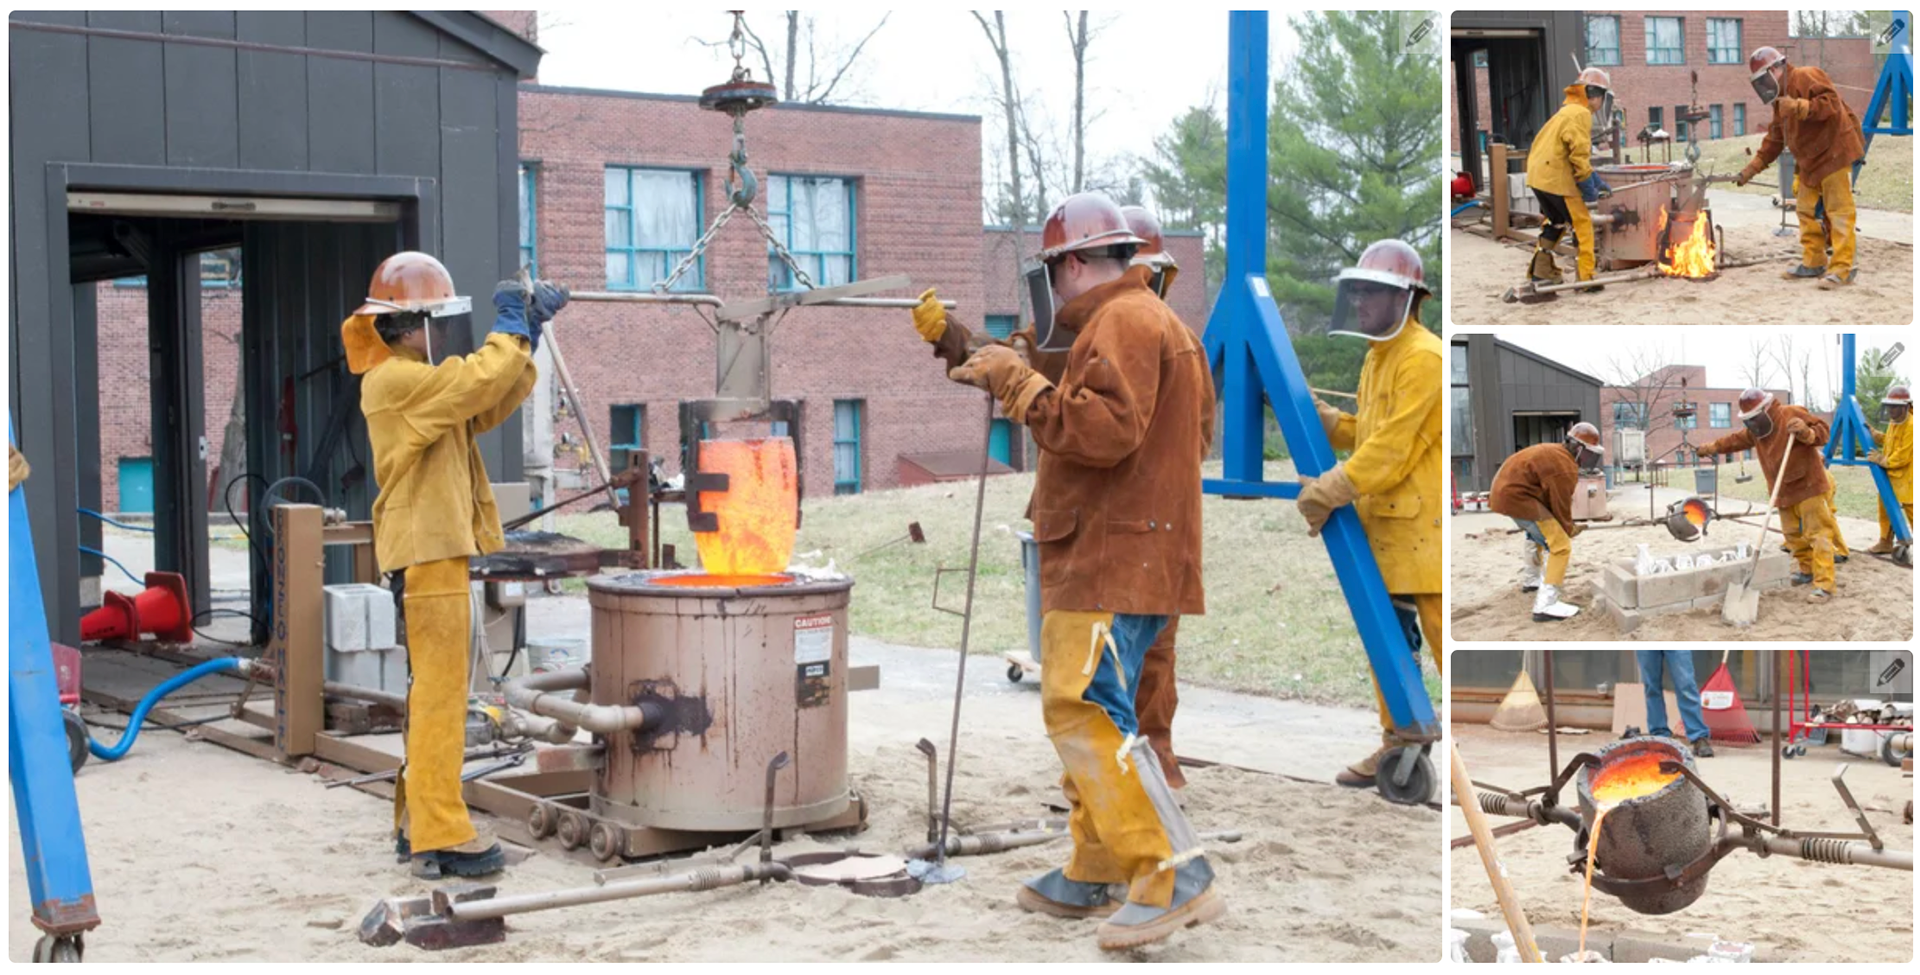
From there, it’s time to pour. Or at least start the furnace. Bronze melts between 850º and 1000º C, depending on the alloy, and when you’re working with that sort of heat, it’s best not to rush. In particular, the enemy of a good pour is moisture. At such high temperatures, water boils instantly, and the rapid expansion can damage the shells, the equipment, and of course, anyone unfortunate enough to be standing nearby. Before it even goes into the crucible, the bronze must be heated to get rid of all traces of moisture; even ambient moisture is enough to be dangerous. The shells are also reheated in the kiln and stored there until the last moment to keep them dry.
In this case, we had a relatively elaborate setup for casting, including a motorized gantry to hoist a much larger crucible than we could use otherwise, but the principles are the same no matter the scale. Before pouring, we scraped the slag off the surface of the molten bronze. Slag is a mixture of impurities in the metal, and in the melting process, it accumulates at the top of the crucible. It’s unsightly, and of course we don’t want to get any in the molds. It’s important to pour from an appropriate height. The bronze cools quickly, and if a pocket of air gets in its way, then the result can be a void or an inclusion. Pouring from an elevated position utilizes gravity so that the bronze moves through the mold fast enough to prevent inclusions.
Step 6: Step 6: Releasing & Chasing
Once the molds have cooled, the finished models can be removed. The release process is sort of like opening a present, but with a hammer. Most of the shell will come off with concussive force (so don't be afraid to really swing that hammer), but smaller bits and complex textures may way need more persuasion. If you have access to one, a sandblaster will help clean everything off (be aware, though, that the pulverized shell will get mixed in with your abrasive media and make it less effective, so try not to get too much in there).
Once the shell is all gone (depending on how complex the model is, this can take quite a while), the sprues, now solid metal, are cut off as waste. Sometimes, sprues can be cleverly concealed on the model, but typically,y they leave ugly spots that need to be cleaned up. The clean-up is called chasing. Using a variety of tools, particularly die grinders, you work the surfaces until the marks from the casting process are gone. If there are voids or inclusions, they can be filled with a MIG welder and a bronze rod and again chased to the desired texture.
Step 7: Step 7: Patinating & Finishing
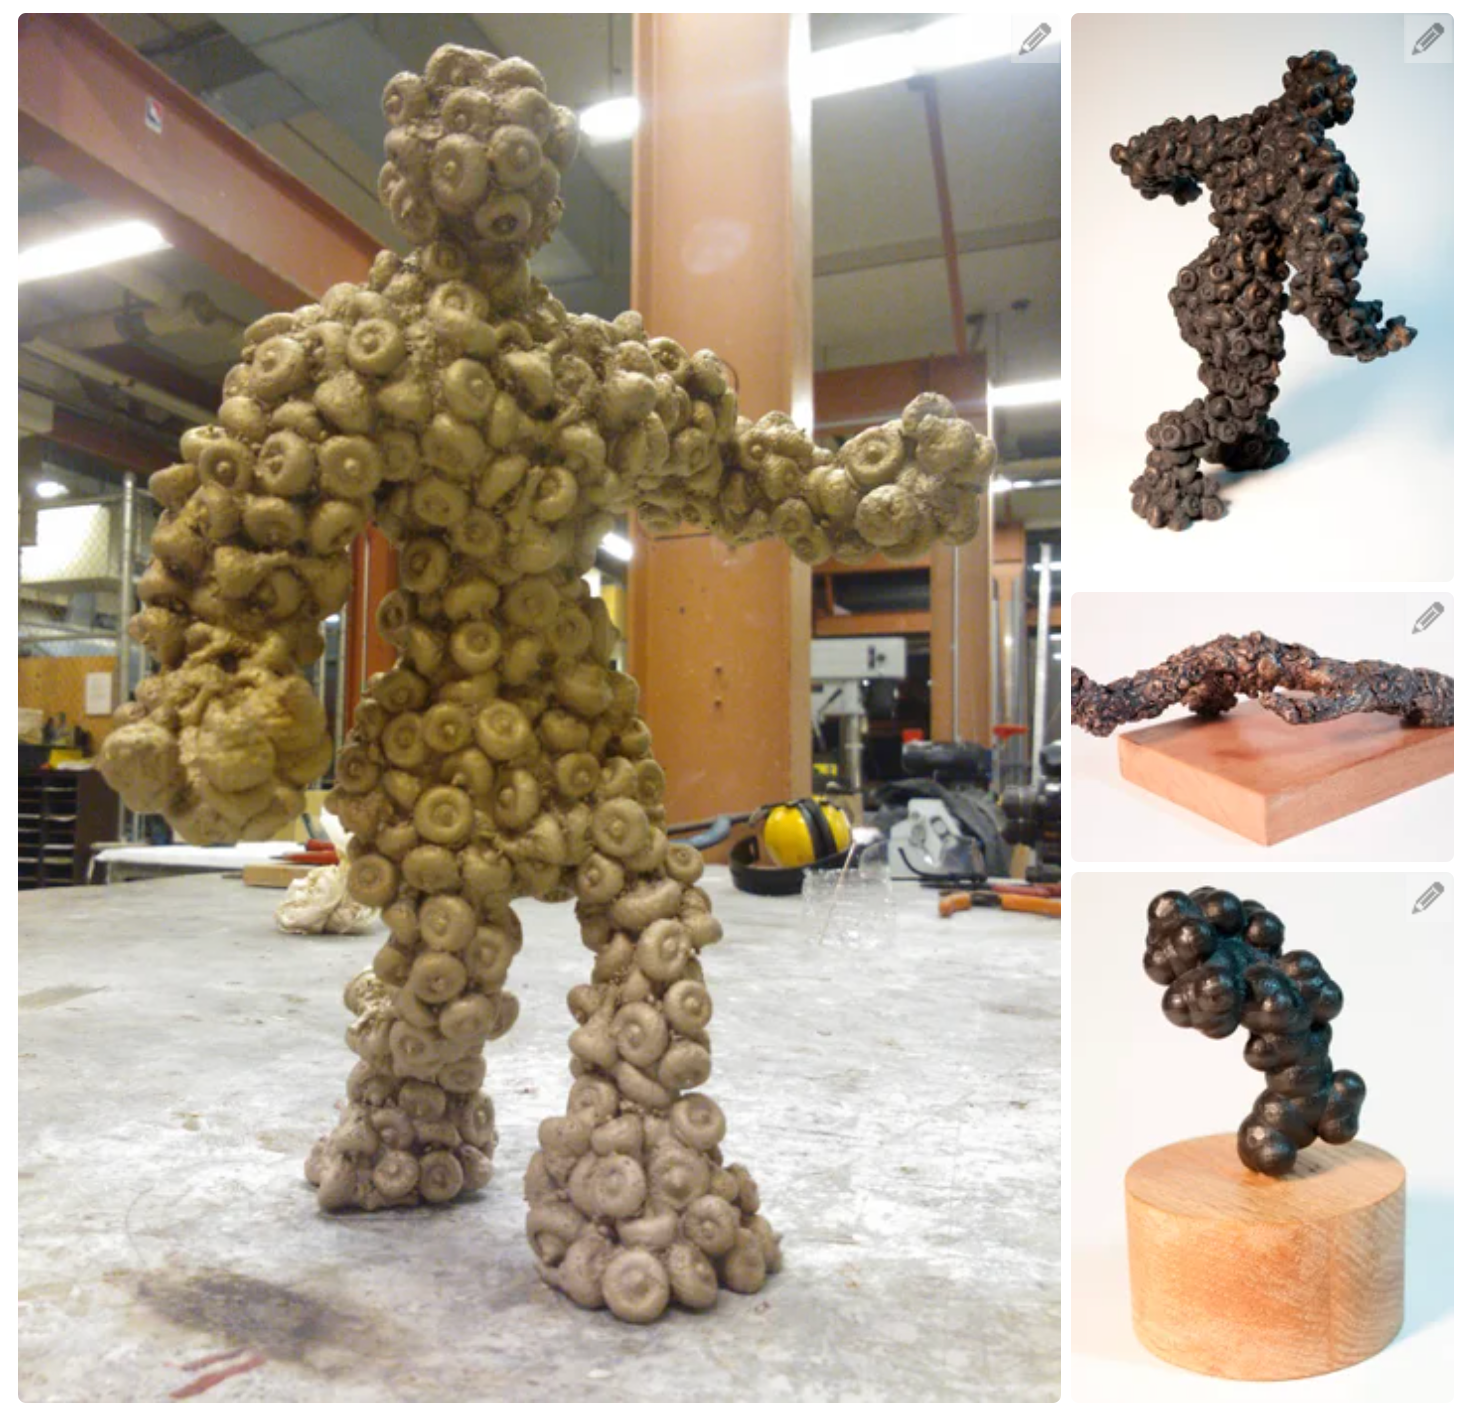
Once the chasing is finished, the sculpture is essentially done, but it can be taken a few steps further. When it’s freshly cleaned, bronze resembles rose gold. It rapidly oxidizes, however, losing that luster and darkening. You can choose to let it age naturally, but that can lead to corrosion. Instead, by patinating the metal, you can take advantage of the oxidation process and produce beautiful new colors. There’s a wide range of chemicals that can be used to patinate: ferric nitrate, cupric nitrate, and liver of sulfur are all popular, but you can get more exotic. I’ve even heard of people creating a patina from urine, although I don’t recommend that one. Once the desired color is achieved, a coat of wax locks in the patina and protects the surface from erosion.
From there, the final step is the presentation. Not every sculpture needs a base, but in my experience, most benefit from one. At a minimum, it’s important to consider how a piece will be presented, and to factor that into the design process. I always like to add a hardwood base to my sculptures unless they truly demand to be freestanding. It’s usually a good idea to drill and tap a small hole into the sculpture in order to fix it in place.
And then, suddenly, you’re done! Step back, crack a beer, and admire your work. Unless someone intentionally melts it down, it will look pretty unchanged 1000 years from now when future archaeologists rediscover it. That’s about as permanent as your work can get.
Casting a bronze sculpture using the "lost wax" process is a fascinating and intricate technique that requires careful preparation and attention to detail. Below, I’ll outline a step-by-step guide on how to sprue and vent a wax sculpture for bronze casting:
Step 1: Prepare Your Wax Model
Start with a complete wax model of the sculpture you want to cast in bronze. Ensure the wax model is free of imperfections, as these will transfer to your final cast.
Step 2: Design the Spruing System
Identify the Main Sprue: Decide where the main sprue will be attached to the wax model. This is typically at the heaviest part of the sculpture or at a strategic location that will facilitate the easiest flow of molten metal.
Attach Sprues: Attach wax rods (sprues) to different parts of your model. These sprues will create channels in the mold through which the bronze will flow to reach all parts of the sculpture.
Ensure Complete Coverage: Arrange the sprues so that metal can flow smoothly and reach all parts of the sculpture without turbulence.
Step 3: Add Vents
Determine Vent Locations: Attach thinner wax rods to the higher points of the sculpture where gases might be trapped during the metal pouring. These vents allow air and gases to escape.
Connect Vents to Sprues: Ensure that vents are connected back to the sprue system or to the outside of the mold, facilitating a clear pathway for gases to escape.
Step 4: Attach Gates
Position Gates: Connect gates (smaller channels) between the main sprue and various points on the sculpture. This helps control the flow of metal into the sculpture.
Check Connections: Make sure all connections between sprues, vents, and gates are secure and well-integrated without any blockages.
Step 5: Assemble the Sprue and Vent System
Reinforce Connections: Use melted wax to strengthen the joints between the sprues, vents, and the model.
Inspect for Leaks: Check the entire system for any gaps or weak points that could cause leaks or breaks when the wax is removed.
Step 6: Invest the Model
Prepare the Investment Mold: Coat or surround the wax model and the sprue/vent system with a ceramic shell or investment material that will withstand high temperatures.
Dry and Harden the Shell: Allow the ceramic shell to dry and harden, following the specific instructions of the investment material used.
Step 7: Burn Out the Wax
Heat the Mold: Place the invested mold in a kiln to heat. The wax inside will melt and burn away, leaving a hollow cavity in the shape of your sculpture including the sprue and vent channels.
Ensure Complete Wax Removal: Make sure all wax is removed by maintaining the kiln at the right temperature for the required amount of time.
Step 8: Cast the Bronze
Heat the Bronze: Melt the bronze in a crucible until it reaches the correct pouring temperature.
Pour the Metal: Carefully pour the molten bronze into the hot ceramic shell, ensuring it flows throughout the entire system.
Allow to Cool: Let the bronze cool and solidify within the mold.
Step 9: Release the Sculpture
Break Open the Mold: Once the metal has cooled and solidified, carefully break away the ceramic shell.
Clean and Finish: Remove any remaining parts of the sprue and vent system, and clean up the sculpture. Perform any necessary welding, sanding, or patination to finish the sculpture.
This process, while time-consuming and intricate, allows for the creation of detailed and durable bronze sculptures. Each step is crucial to ensuring a successful and high-quality cast.